Monday, October 29, 2012

Grape Harvest Completed

    I finished juicing the last of our grapes a few days back.  The total production for this year was 6 gallons, which is down some from prior years. Part of that drop is due to the fact that the grapevines out by the driveway were severely pruned when we took down the old deck and split rail fence.  The vine that was growing up on the old deck is an Interlaken grape and has been very productive in years past. There are also two Canadice grapevines next to the driveway that previously were trellised along our split rail fence.  Linda has persuaded me to remove all three of those vines this coming winter.  As a trade off I will be expanding the front vegetable garden to include that entire side of the front yard.
From left to right, Interlaken, Canadice, and Valiant grape juice

     The color variation in the grape juice depends on which varieties of grapes were used to make each batch.  The purple Valiant grapes produce a dark juice that looks and tastes similar to the frozen Concord grape juice sold in the grocery store. The red Canadice grapes produce a pretty rose colored juice, while the green Interlaken grapes produce a light pink grape juice.  The juice is translucent when it first is put into the bottles from the steamer juicer and turns opaque within an hour or so as the juice cools.  I discussed this phenomena with a chemist friend. He explained that the sugars and other compounds may be forming micro crystals as the juice cools. The crystals are small enough such that they remain in suspension and cause the juice to become opaque.
The bulk of this year's grape harvest

    I briefly thought I had a deer problem as the low hanging grape vines around the duck pen had been pruned to a higher level.  I've actually seen a few deer in the neighborhood within the past month, although never that close to our yard. I even found some suspicious looking tracks in the new garden bed I'm making just next to the duck pen.  As it turns out, deer tracks and goat tracks are very similar. I had fed grape prunings to the goats when we had to prune back vines during the summer. Jack Black apparently developed a taste for them and was doing a little extra curricular pruning during one of his escapes.  Fortunately, I had already harvested those grapes and I would have pruned those portions of the vines anyhow.  Jack Black tends to be a bit indiscriminate in his pruning so I need out find out how he is getting out and repair or reinforce that portion of the fence.

     Linda and I enjoyed a visit from Conner and Natalie today.  Conner helped me harvest apples this morning.  It made me glad that I hadn't yet pruned off all of those lower branches as I watched Conner standing on his tiptoes to pick apples.  After I had emptied my special apple picking bag I could hear the apples begging me to make them into a pie.  When I told the kids I was going to make apple pies, Natalie immediately volunteered to help. She has a keen interest in cooking for one so young.  I let her add the cinnamon and she got a little carried away.  The pies still turned out well, but they had the most cinnamon of any apple pies I have ever made.  The crust was wonderfully light and flakey thanks to Emeril's pie crust recipe and my low protein biscuit flour. Happiness is being able to consistently make wonderful pie crust.

Wednesday, October 24, 2012

Fireplace Insert

    I had a quiet day at the bee store today, just one paying customer.  I took advantage of the time to get caught up on accounting stuff and to do some assembly work. If this keeps up, I may even have time to get better organized and tidy the place up a bit. I also found time to make yet another batch of fire starters. I use paraffin, beeswax scraps, dryer lint and paper egg cartons to make fire starters for the wood stoves.  Its getting to be that time of year when I need to be more concerned about the size of my wood pile and my supply of fire starters.  I have several cords of wood stacked and dried, but I should really have more than that.  I also need to get our fireplace insert up and running.

Fire Starters, made from paraffin, scrap beeswax, dryer lint, and paper egg cartons

Our Colony Hearth Fireplace Insert

The optional cooking surface

    I got a good deal on a used Colony Hearth fireplace insert towards the end of last winter. The only catch was there was no firebrick inside the stove.  I bought the necessary firebrick, but there was a certain amount of grinding and cutting required to make it fit in the stove.  I got halfway through that process last spring when the store got busy and the fireplace insert dropped quite a few places on my priority list. The recent cool weather has moved that job right back to the top of the "To Do" list.  I've got another minor problem to fix before the new stove will function properly. The person who designed our fireplace thought it would look nice if one side of the mouth of the fireplace were to be recessed several inches. Artistically speaking, that may have been a good idea. I don't have an opinion on that aspect. However, the fireplace insert won't draw properly unless the resultant gap can be plugged to force all of the chimney's draft to come through the insert.  My friend Quentin, who knows how to fix practically anything, has an idea how to make that work.

   This particular fireplace insert has a door that can be easily lifted off so that it can also function as an open fireplace if desired.  It also has a nice flat area on top of the stove that can be used for cooking.  That feature will be very popular the next time we lose power for several days.  I'm looking forward to having a serious wood stove in our living room. The fireplace didn't provide much in the way of heat and mainly served for esthetic purposes.

     I also am anxious to try out the fireplace insert as a bread oven.  Our bishop, a serious bread baker, has taken to baking bread in their fireplace insert. He developed the technique from necessity as they had a power outage once last winter while he had bread rising.  His effort to salvage the bread turned out so well that it became his preferred method of baking.  He simply builds a good hot fire, lets it burn down to coals, then pushes all of the coals to the back of the stove and plops his bread dough right onto the firebricks.  He says that he gets as good as spring from the insert as from his regular oven.  Bishop Nielson also has a little magnetic thermometer attached to the outside of his fireplace insert so he can better determine the temperature of his bread oven.  I was interested enough in baking to capture my own wild sour dough starter, but I have only dabbled thus far in baking bread. I would like to bake bread more often, especially now that the weather has turned colder.

Monday, October 22, 2012

Bean Soup

     I've been anxious to try cooking my home grown dry beans so I made some bean soup tonight.  I didn't do anything fancy.  I just soaked a cup of Rockwell beans for about six hours. I would have soaked them for 24 hours, but I was a bit impatient.  I was amazed at how quickly they cooked.  I had  heard that old dry beans take much longer to cook than fresh dry beans.  I had never cooked with fresh dry beans to see just how much difference there was.  After the six hour soak I boiled the beans for a half hour and then let them simmer while I was busy juicing grapes with the steamer juicer.  By the time I finished juicing the grapes I noticed that the beans were done.

    I made a fairly simple soup. I added 1/2 chopped onion, a few chicken bouillon cubes, some minced garlic, three or four slices of cooked chopped bacon, and some black pepper. I cooked it just enough longer for the onions to be done.  Linda and I both thought it turned out pretty wonderful. Most of the pretty color of the Rockwell beans disappeared with the soaking.  What little color was left didn't last through the cooking. They looked pretty much like any other cooked white bean.
Bean soup, very simple and very tasty, 

    There seems to be a diversity of opinions as to the proper way to soak dry beans.  I read a book entitled The Resilient Gardener last summer.  It is sort of a sustainability/organic/survivalist gardening book. It is devoted to the subject of raising five specific things that a home gardener in the maritime northwest could use to provide all of their own food supply in difficult times. Those five things were potatoes, beans, corn, squash, and ducks.  Obviously, a significant portion of the book was devoted to growing, harvesting, and cooking dry beans. The author, Carol Deppe, advocated the same soaking method for cooking beans as she did for planting beans, that is a 24 hour soak with several changes of water.  I have soaked legume seeds overnight prior to planting for many years. I have not changed the water several times during soaking.  Carol Deppe is a plant breeding expert so she is pretty specific when it comes to methods of growing, storing, and planting seeds. She also eats a great deal of beans and claims that the longer soaking time greatly reduces the amount of gas produced when the beans are eaten.

    In the past, I have mainly relied on the method of soaking and cooking dry beans that I found on the labels of the cans of dry beans we got from the LDS dry pack cannery.  That method is very simple and  works very well.  The beans are sorted and rinsed. Then one pound of beans is boiled for two minutes in eight cups of water. The beans are then soaked for one hour, then drained and rinsed. Finally the beans are cooked for 1 1/2 to 2 hours. This method has the major advantage of being quick. You could decide you would like beans for lunch right after you finish breakfast and you would still be able to pull that off.

   I can't say for certain that the longer soaking time reduces the gas effect, as I haven't given it a fair trial. However, this particular batch of bean soup didn't seem to have the usual effect.  Possibly that came from a longer soaking time. It could also be that I didn't eat as much of the soup as normal. (Linda wanted me to save her some for lunch the following day).  Since I harvested about a gallon of dry beans this fall,  I should be able to figure this out before they are gone.

     Carol Deppe offers another helpful suggestion as to how to reduce the gas produced by eating beans.  In her opinion the main problem is that we don't eat beans often enough. Thus our individual digestive tracts are not properly adapted to eating beans. We don't have the right mix of intestinal flora that would develop if beans were part of our every day diet. In other words, we get gas from eating beans because we only eat them once in a great while.

    As I stated above, the fresher the dry beans, the easier they are supposed to cook. Another important factor is the water.  My grandparents (Guy Dudley Tunnell and Linnia Sylvia Lee) lived on a farm near Mystic, Iowa. I have wonderful childhood memories of time spent on their farm.  They had no indoor plumbing and got their water from a hand pump well in the front yard.  Their well water had a very high mineral content and tasted strongly of iron.  I actually liked the taste of their water, but it didn't work very well for cooking beans. Allegedly, the beans could be boiled for hours in their hard water without cooking. Consequently, they had to bring home water from town specifically for the purpose of cooking beans. Beans and cornbread made up a significant portion of their diet. I don't know how Grandma Tunnell prepared the beans for cooking. I don't recall if they raised their own dry beans either. I was only interested in eating them at that age. I'll have to ask Mom if she remembers any details.
 

Friday, October 19, 2012

Grandpa Jim Meets an Author

     A few weeks back I received a call from a fellow who wanted to buy some live bee grubs and live bees. He turned out to be an author, David George Gordon, who had written a book about eating bugs. The book, originally published  over ten years ago, was going to be republished next summer. He wanted to update his book with some additional photos, including the recipe for "Three Bee Salad".  I was able to satisfy his request by selling him a frame of brood from my modified Warre hive. He stopped by the bee store a few days later to pick up his purchase. I found him to be a very engaging person with a showman's flair, and certainly quirky enough to make a good beekeeper. Exactly my kind of people.

    As it turns out he has written a number of other books, one of which I had actually read, "The Field Guide to the Slug". This is an invaluable book for any organic gardner in the maritime northwest. Slugs are truly the bane of my existence as a gardener, particularly during our soggy spring weather. The best way to control any garden pest is to first learn about their life cycle.  It is really important to know your enemy. There wasn't a great deal of information generally available in the local library on slugs and snails until Mr. Gordon filled that void. Since the publishing of "The Field Guide to the Slug" he has even written a sequel, entitled "The Secret World of Slugs and Snails: Life in the Very Slow Lane". That one I haven't yet read, but I'm looking forward to it. He also wrote a book entitled "The Compleat Cockroach". I think I'll pass on that one.

     The "Eat-A-Bug Cookbook" details the use of bugs as food in various cultures throughout the globe. It also has lots of recipes that allow one to incorporate common local insects into dishes that are sure to grab the attention of all the guests at that fancy dinner party. I have a bee store friend who is really taken with the wonderful flavor of raw bee grubs. He described them as tasting better than the sweetest creamed corn he ever ate. I haven't yet taken up his challenge to try them. Somehow it seems wrong to me to eat my bees. Yet, I'm not so sentimental that I can't eat a duck or a chicken.

      Before leaving, David gave me his business card.  He even offered to send me an advance copy of his revised bug cookbook.  One of the things he does for a living is to travel around the country doing lectures and demonstrating bug cooking skills. I looked at his website a few days ago and discovered that he will be doing a demonstration on Halloween at Paxton Gate, a science store in Portland.  I thought I should make sure the Portland area grandchildren were aware of this. Since Halloween falls on a Wednesday this year, it sounded like a great excuse for a field trip.  More information about David George Gordon, author, lecturer, bug chef, is available at davidgeorgegordon.com.
David George Gordon at the Beez Neez

My personal copy of  "The Eat-A-Bug Cookbook"

      I wrote the above portion of this post this morning.  Much to my surprise the bug chef himself dropped by the bee store this afternoon for a visit.  He returned the empty frame, having removed the comb and brood, and brought me a copy of his book as promised. I was, of course,  delighted to add another cookbook to my collection. I don't think I'll be getting many volunteer guinea pigs for these recipes. (I promise I won't be serving them on the sly to unsuspecting relatives.) He showed me the photo of "Three Bee Salad" to be included in the next printing of his book. We also discussed various possible methods for removing frozen pupae and larvae from the combs. It appears I might end up as the regular purveyor of bee brood to the bug chef. If so, I don't think I'll be changing my business cards to reflect that.


Wednesday, October 17, 2012

Knitted Beehive Hat

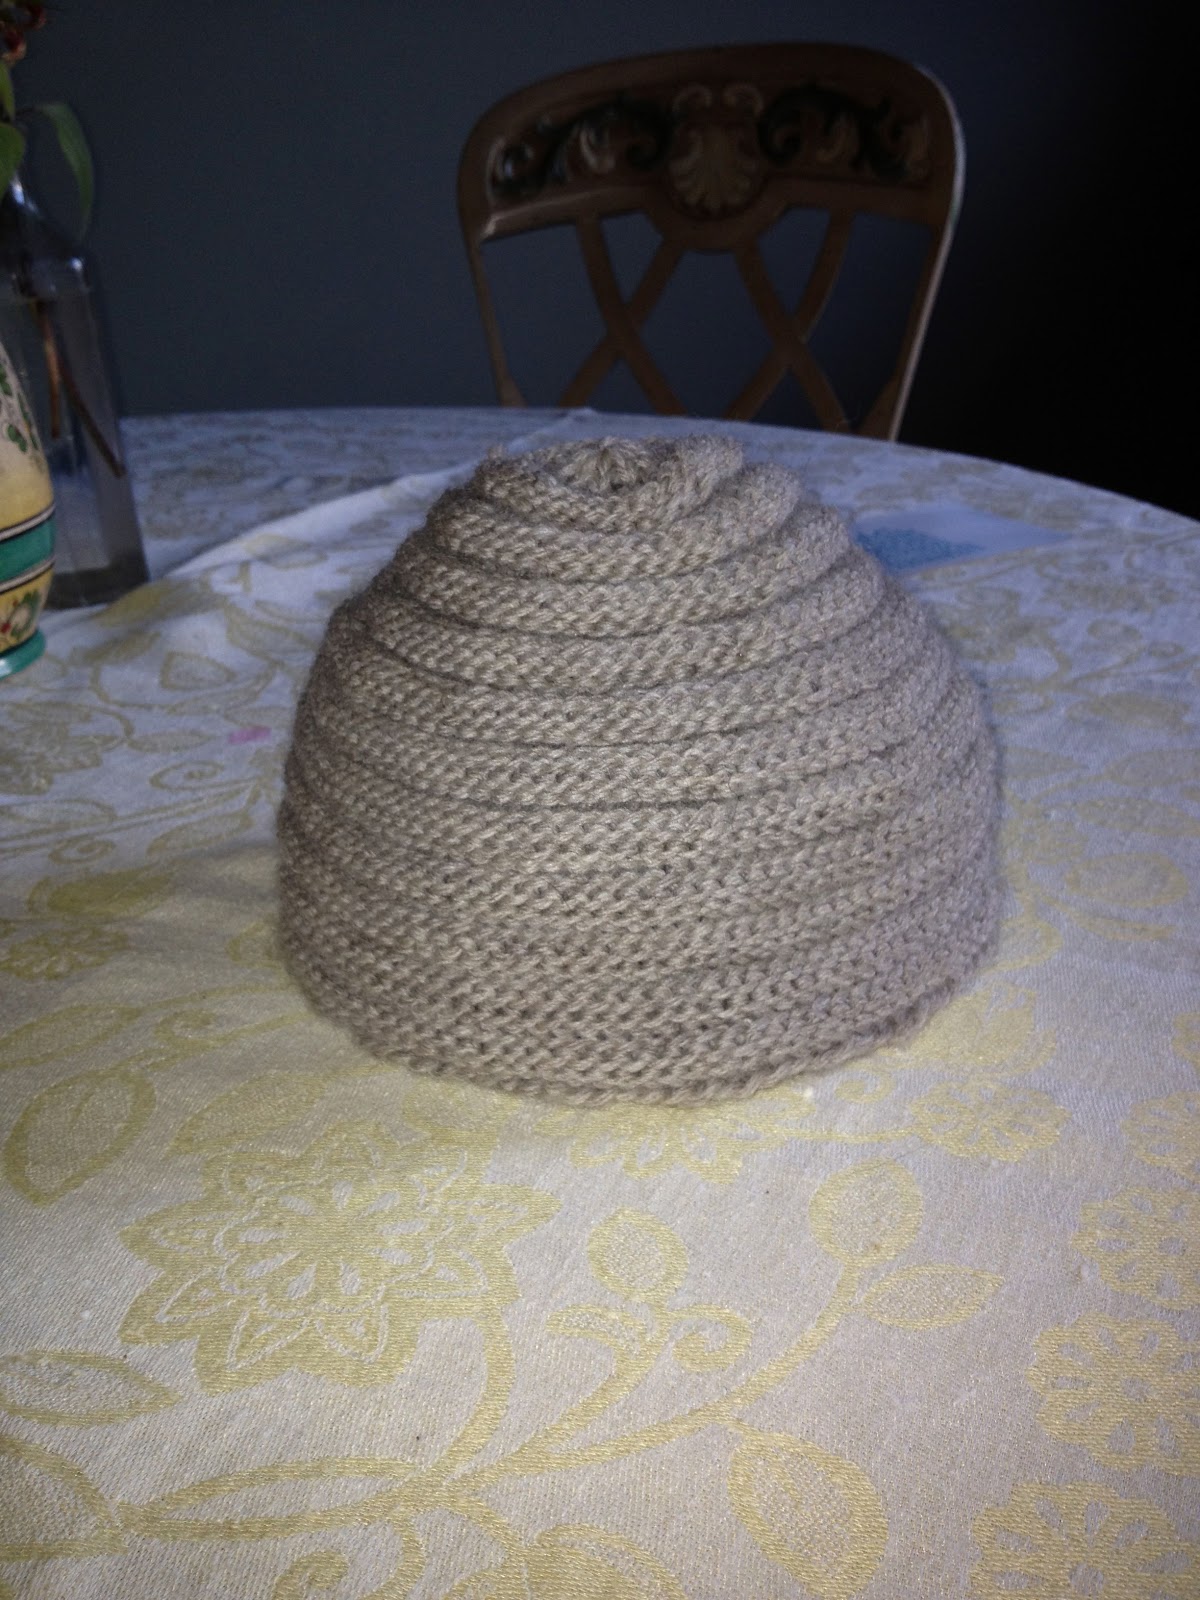
   I finished the beehive hat I started after the Beekeepers Convention. It was pretty easy and would have been even easier if I hadn't lost the directions on how to do the decrease.  It only required beginner knitting skills, cast on, knit, purl, and knit 2 together.  The hat is knitted in the round and the pattern is just three rows of knit followed by four rows of purl. It holds the beehive shape even when its not being worn. Linda was a bit skeptical when I first told her I was knitting a beehive hat.  However, it grew on her and she ultimately declared it to be very cute.
Knitted Beehive Hat. All it needs now is some carefully placed honeybee buttons.

    Business has slowed down at the store. While I always welcome business it is nice to be able to catch  my breath and get caught up on a lengthy "To Do" list.  I bottled honey this morning,  then cleaned out old frames while I filtered beeswax in the afternoon. Last night I made some cut comb honey before I left work.  I usually buy comb honey from a local beekeeper, but there wasn't much available this year.  Hopefully the cut comb I did will tide over those customers who just have to have their comb honey.
Quentin, my trusty employee, is off hunting in Wyoming so I'm working 5 days a week for most of October. I guess I've grown accustomed to my usual three day work week which allows more time puttering in the garden.

Monday, October 15, 2012

Roast Duck

    Its been a busy week and I finally got around to roasting the duck. I agonized for several days over which recipe to use. I borrowed Julia Child's book from my daughter-in-law, Beth. I also spent a lot of time with an Italian cookbook entitled "The Silver Spoon" that I had purchased last fall.  I finally settled on a recipe from the Italian cookbook called "Anitra Farcita con Miele" or "Stuffed Duck with Honey" (page 1014). I guess I'm a sucker for recipes that include honey.

Stuffed Duck with Honey

     I'll admit up front that I didn't follow the recipe faithfully. I used bacon in the stuffing because I had bacon but didn't have ham. I also added a little semi-cooked rice to the stuffing just because I wanted rice. I partially cooked the rice before I put it into the stuffing because I had a bad experience once with dry rice in a stuffed bird that failed to cook completely (the rice, not the bird). The stuffing ingredients  included chopped onion, about 6  chopped slices of cooked bacon, chopped duck liver, and one cup of brown rice (partially cooked), and a portion of the honey and soy sauce mixture that was used to marinate and baste the duck..  The stuffing turned out very well.

    The roast duck itself was wonderful.  I omitted the brandy called for in the marinade recipe. Since I don't drink I don't have brandy sitting in my pantry. I don't know how soy sauce ended up in an Italian cookbook but I can't argue with the results.  My sweetie isn't a fan of roast duck and hasn't been feeling well the past few days anyhow.  Consequently, I have the roast duck all to myself.

     As much as I enjoy eating roast duck that is pretty far down the list of reasons why I keep ducks, The primary reason is probably slug control. Slugs are the bane of any organic gardener's existence in our wet maritime climate. Its nice to have the ducks happily eating the slugs and magically turning them into duck eggs. In the fall and in early spring I can let the ducks run loose for a  while every day and let them forage for slugs on their own. When the garden is full of young emerging plants and is rather fragile I do the foraging for them and collect slugs from the garden and yard. That is not as tedious as it sounds as our slugs are quite large and numerous.  Its hard not to love a creature that can eat a slug with such enthusiasm. I wish I could leave them out more but they require close supervision while foraging. I'm not the only creature in the neighborhood that enjoys eating duck.

   Another important reason I keep ducks is the fact that my sweetie really enjoys having them around.  The India Runner ducks have an upright carriage that makes them resemble a walking bowling pin. They were built for slapstick humor. They make her smile whenever she sees them waddling around our yard. Eggs are yet another good reason to keep ducks. The India Runners are prolific layers and kept us well supplied with eggs. I had one duck that started to lay the last week of January and other one started the first week of February. That was without any artificial light to encourage them to lay. They started well before the chickens although I'm still getting eggs from our chickens. The ducks started their egg laying hiatus several weeks back.

     Soil fertility is also a wonderful benefit to having ducks. I muck out the duck pen at least three times each year and it all goes right into my garden beds. I periodically generate lots of sawdust and shavings at the bee store. Most of that goes into the duck pen as bedding. After the addition of copious amounts of duck manure it comes out as compost.
     

Wednesday, October 10, 2012

Beeswax Lip Balm


Loran Oils Lip Balm Kit
     The presentation at the bee club meeting last night went well. It was a pretty good laugh line when I told them I had made lip balm for the first time the previous evening. I told them that had always been Rachel's area of expertise. I also thought that was a pretty clear indication that making beeswax lip balm is not difficult. I simply bought a kit, followed the simple instructions, and the lip balm turned out great on the first try. The only complication I see is measuring the beeswax. The recipe called for three teaspoons of pelleted beeswax. As far as I know, none of my friends at the bee club produce pelleted beeswax from their hives.  I used my cooking scale to convert that to a weight measurement of 10 grams of beeswax. Similarly, some of the recipes I found on the internet also used volume measures of beeswax rather than weight.

    I'm thinking I should make up some lip balm kits to sell in the store during the candlemaking season. I've already gathered a selection of recipes from the internet in preparation for the bee club presentation. Several of the store's jar suppliers carry small containers suitable for lip balm. That would give me an excuse to experiment a little more. I could even make up a lavender lip balm for those misguided souls in the family who think lavender is a flavor. However, I think it would be much more satisfying to make it from my own beeswax rather than the pelleted Chinese beeswax that came in the kit.

    Last night also marked the start of my last month as bee club president. We hold elections in November and I have put everyone on notice that I am not running for re-election. I feel like I have done my duty for a year and its now someone else's turn. It seems the most difficult part of the job is  recruiting a replacement. You can never find a good control freak when you really need one. However, I think I have successfully persuaded several qualified applicants to allow themselves to be pressed into service.